This site contains affiliate links, view disclaimer for more information
Hello my coffee people!
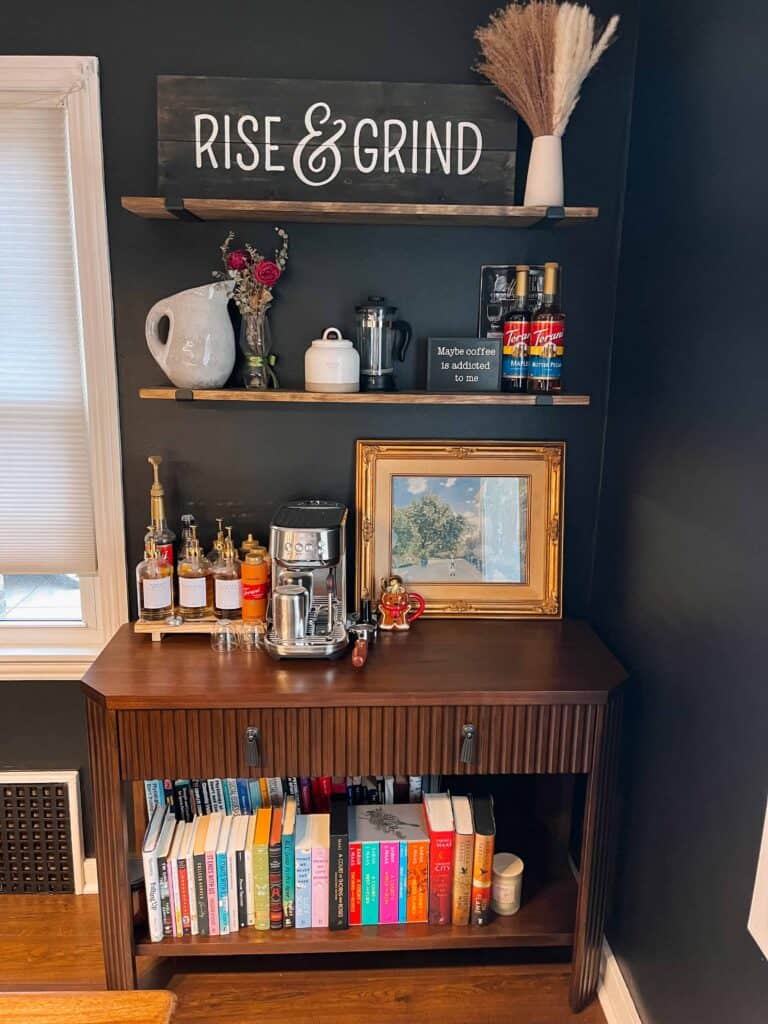
I am finally getting around to finishing my dining room, and if you know or don’t know – we moved into our first home in June, it is around 1300sq/ft, so it is on the smaller side! With that being said, I did not have many options for incorporating a coffee bar into my kitchen area, so I opted to add it into our dining area! Honestly, I think it turned out great here, and works well since we have the space for it. Let’s get into how I styled it!
HOW I DECIDED WHAT TABLE TO USE FOR MY COFFEE BAR
My initial thoughts going into the coffee bar was to find a modern / mid-century buffet table or credenza / side-boards (too many names for these now?!), and I originally had two black ones with cane webbing material (these ones), which I did really like – but the two together were a bit large and didn’t fit in this space how I wanted them too!
As I was patiently waiting for the right type of table to call my name (as one patiently does ;)). Target was releasing new items soon, and that is when I saw ~ her ~ this beautiful dark toned table that I immediately knew was PERFECT for my space! I actually debated getting it for a bit, but it kept invading my thoughts so I decided it was time to buy it Lol! The best part, is it comes FULLY ASSEMBLED!
HOW I STYLED MY COFFEE BAR
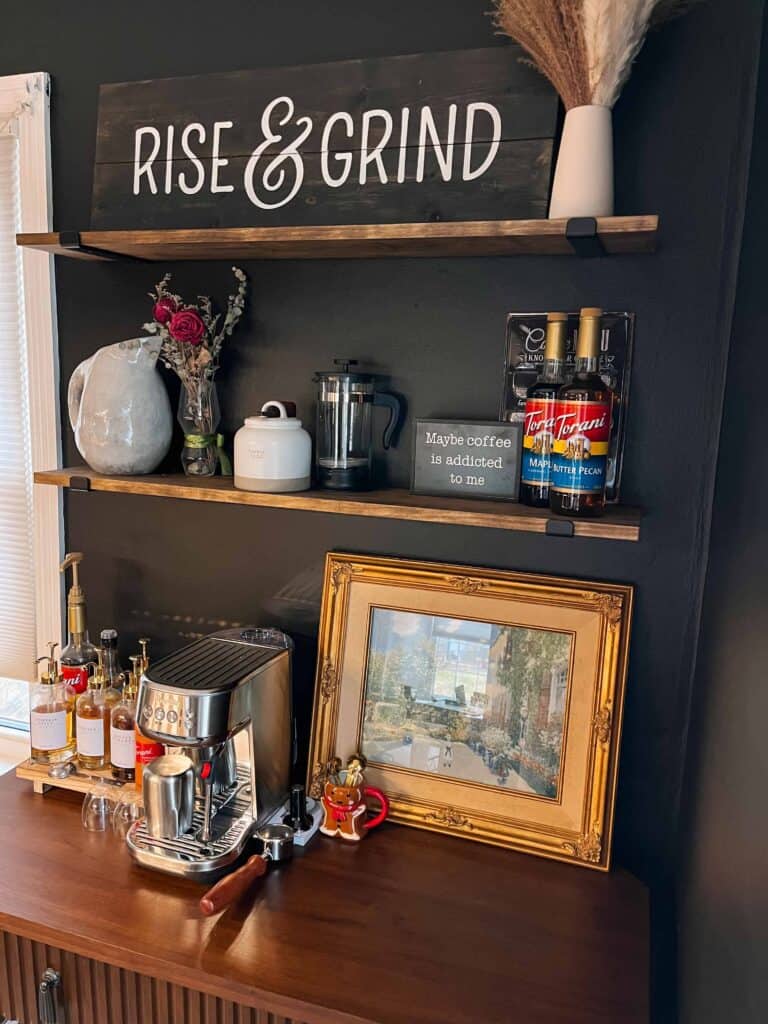
As you can see, we have a handful of books, and no bookcases as of yet – so for the moment, I thought this was a great spot for my books! I currently am using a candle as my bookend too, because I have lots of candles, and no book ends (yet!). I have noticed Etsy and TJ Maxx have some cute book ends though – so if you are looking!
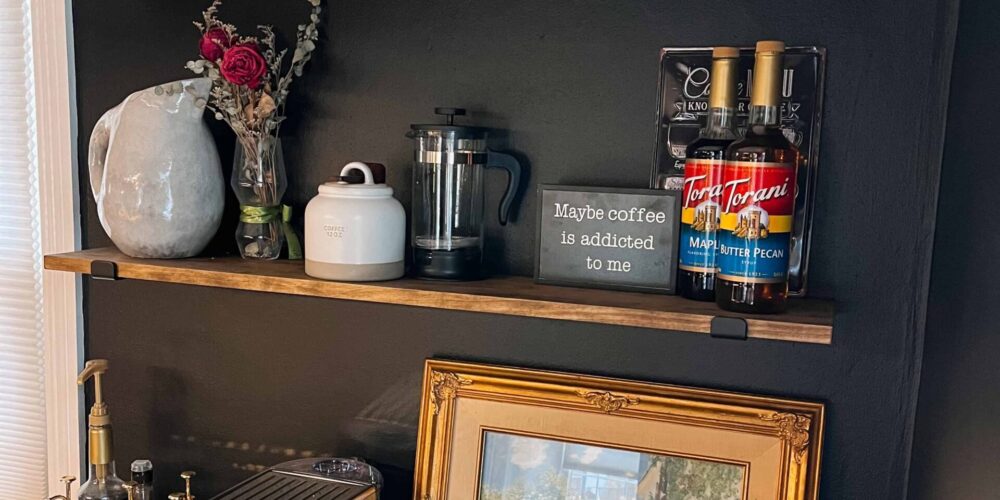
On top of the table, of course we have the latte syrups – to elevate the space a bit more, I put the syrups on a riser/tray. It makes the space feel a bit more put together and organized! Additionally, found the cutest glass syrup bottles from Amazon that have gold spouts (click here for items). I recommend getting your syrups just off Amazon or go to TJ Maxx, they always have good deals on syrups 🙂 I also wanted to add some art to this space to give a little more dimension on this level (good to add things that are different heights, and well balanced with one another). This picture I actually thrifted and I absolutely love it!! Plus it was only $15 – you really can find some great art pieces at your local thrift store, highly recommend! The last thing I have on the table, is of course my espresso machine – I have the Breville Bambino Plus (a GREAT beginner espresso machine), I will go into full details on my coffee / espresso set-up in another post because there is so much I can talk about with it!
HOW I STYLED MY FLOATING SHELVES
For my floating shelves, I DIY’d these (find that post here) – SUPER easy and they look great! I had created this sign “Rise and Grind” at a wine & paint activity with my mom and sister – and it just fits perfectly here. The key to styling shelves or cabinet cases is balance – for example, I put some florals on the bottom left shelf and some on the top right shelf. Another example, on the bottom shelf the items at both ends are a little taller, while the middle is a little shorter. Lastly, I put the Rise & Grind sign on the top left side, because my thrifted art piece is on the far right side of the table! When deciding what to use, think about using vases, art work, decorative bowls, candlesticks, and items in that genre 🙂 As always, let me know if you have any questions!